INTRODUCTION
Deutsche HydraproTM developed their Hydrapro Electric Over Hydraulic (EOH) Brake Actuator in conjunction with a global German hydraulic pump manufacturer with over 90 years of experience providing innovative hydraulic drive and control technologies.
The Deutsche Hydrapro braking unit has been designed with high quality in mind for various road conditions. We are proud to introduce the Deutsche Hydrapro braking system to the North American market.
Specific information on EOH braking system
The Deutsche Hydrapro EOH brake actuator's quality and simplicity give you the necessary reliability required for a trailer braking system. In addition, it has a superior response time that delivers shorter stopping distances, which gives the driver confidence while towing.
Some of the Hydrapro features include:
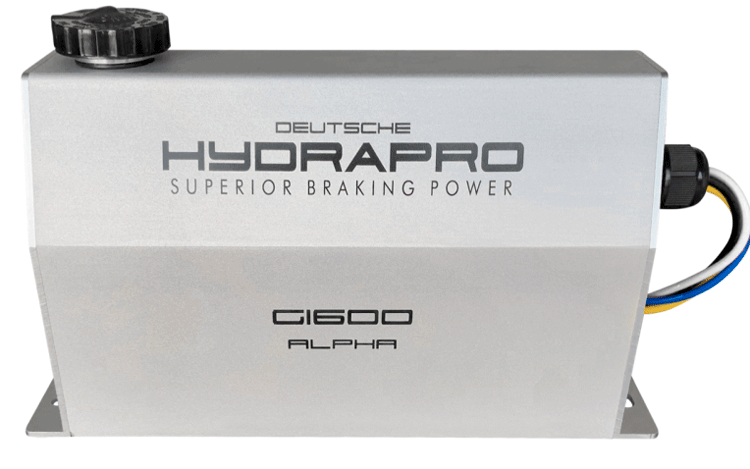
Compactdesignmeasuring257mmlong,152mmhigh,90mm wide base / 44mm top.
High-poweredDCMotorandqualitypumpwithminimalmoving parts for reliability.
Largeindependentlysealedfluidtankprovidingextrafluid reserves.
Weatherproof,anodizedalloycasetoprotectcomponentsfrom external elements and corrosion.
Robustelectronicsboardthathasaprotectivecoatingfor corrosion resistance.
Competitivepricing,makingthesaferchoiceofanEOHbraking system much more accessible; and
Two-yearwarranty,givingyoupeaceofmind.
The Hydrapro braking unit's features combine to make it less susceptible to saltwater, extreme temperatures, and poor road conditions and still deliver superior braking power in harsh and corrosive environments.
The Hydrapro unit is a wise choice for an electric over hydraulic braking system. It is well suited to all trailers, including single, tandem, triple axel boat trailers, caravans, and utility trailers. For more information, please email us: info@hydraprousa.com
SERVICE MANUAL AND SPECIFICATIONS FOR THE DEUTSCHE HYDRAPRO ALPHA G1600, G1200, G1000 MODELS CONTENTS
Actuator Installation Instructions 5 Getting started 8 Electrical Installation Requirements 10 Actuator Color Code and Diagram 11
Test Electric / Hydraulic Operation 13
Bleeding and Brake Adjustment Testing and Adjustment Troubleshooting Guide Limited Warranty
14 16 17 20
ACTUATOR INSTALLATION INSTRUCTIONS
This manual has been provided to guide you through installing, operating, and maintaining your Electric Over Hydraulic (EOH) brake system actuator (Alpha G1600, G1200, and G1000) used for hydraulic brakes. This electrically powered unit has been designed and manufactured to give safe, reliable power to your hydraulic brakes.
Before proceeding, please refer to your brake manufacturer for proper operating pressures.
The Deutsche Hydrapro actuator is compatible with many electric brake controllers, but a proportional, inertia type In-Cab controller will perform best. The non-proportional brake controllers are unsuitable and can damage the brake actuator unit (It is essential that when the tow vehicle is stationary, the brake actuator is not constantly operating at full pressure).
Wiring Colors and Function
Black – 25-40 amp 12 volt supply from the tow vehicle Blue – Output from in-cab electronic brake controller White – Ground must be directly connected to tow vehicle ground Yellow – Cold side of the breakaway switch *Cold temperature (below 0 degrees F/ -18 C) applications require 40 amp.
"ATTENTION" This is a safety warning. It is used to alert you to potential injury hazards. Obey all safety messages that follow the "ATTENTION" safety warning to avoid possible injuries. Please note this summary of important information before installation of a Deutsche Hydrapro brake actuator:
CORRECT INSTALLATION
A qualified individual must install the Deutsche Hydrapro brake actuator. Please note that failure to install and maintain this unit correctly will cause it to malfunction, which could result in severe or fatal injuries and property damage.
BRAKE ACTUATOR MODELS
It is the installer's responsibility to determine output pressure of the Deutsche Hydrapro brake actuator is correct and that the model selected is suitable for the trailer it is being installed on. If the trailer braking system is over-pressurized, it can malfunction.
PARKING BRAKE
Deutsche Hydrapro brake actuator does not provide a parking brake function. This brake actuator is designed as a secondary source of braking only, which supports the primary brake system of the tow vehicle. The Deutsche Hydrapro brake actuator is not intended as a primary braking system for the towing vehicle.
IN-CAB BRAKE CONTROLLER
The Deutsche Hydrapro actuator is compatible with many In-Cab brake controllers, but a proportional, inertia type controller will perform best. The older, non- proportional controllers are unsuitable and can damage the brake actuator unit. (It is essential that when the tow vehicle is stationary, the brake actuator is not constantly operating at full pressure). For a list of compatible In- Cab controllers, please refer to your dealer or check the Deutsche Hydrapro website.
EMERGENCY BREAKAWAY SYSTEM
An emergency breakaway system with battery backup must be used with the Deutsche Hydrapro braking actuator. The breakaway system must be functional, and the battery backup must be fully charged before the trailer can be towed.
WEATHERPROOF
The Deutsche Hydrapro system is weatherproof. However, it should not be power washed or submerged in water. If the actuator is submerged or subjected to direct water spray when washing the trailer, it can cause the actuator to malfunction.
GETTING STARTED
The following materials are required to install the Deutsche Hydrapro unit properly. If your trailer is not already equipped with brake lines, you will need enough 3/16" diameter automotive brake line to connect the trailer brakes to the unit.
One liter of DOT 3 or DOT 4 brake fluid (from a new sealed container)
One emergency breakaway system - must include a 12-volt, five amp-hour (minimum) battery.
Wire (see Electrical Installation Requirements for correct wire size)
The location of the Deutsche Hydrapro actuator is at the discretion of the vehicle owner. When selecting the location, the following items should be considered:
ATTENTION
It is crucial to mount the Deutsche Hydrapro unit in a position where it will not be immersed in water. Failure to do so will void the manufacturer's warranty in the event of water damage.
Keep the wiring between the Deutsche Hydrapro unit as short as possible to avoid voltage drop. The shorter the wiring between the unit, the lower the voltage drop.
An emergency breakaway system must be located on the trailer so that the trailer breakaway cable can be easily attached to the towing vehicle.
The tow vehicle's electrical system powers the Deutsche Hydrapro actuator. For the unit to function correctly, it must have adequate electrical power (see Electrical Installation Requirements).
ATTENTION
The Deutsche Hydrapro actuator contains electronics that need to be protected. Drilling holes in the housing welding on or near the unit may damage the actuator and render it unserviceable. This will void the manufacturer's warranty. Always remove the actuator unit from the trailer or caravan before welding, repairs, or modifications.
Connect the trailer brake lines to the actuator unit as follows:
Connect the brake line to the (3/16" inverted flare) adjustable hydraulic fitting, which screws into the actuator outlet port.
The brake line must be compatible with DOT 3 and DOT 4 brake fluid.
Fill the Deutsche Hydrapro unit with DOT 3 or DOT 4 brake fluid to the level with the bottom alloy filler neck.
ATTENTION
Always use new DOT 3 or DOT 4 brake fluid from a sealed container. Do not attempt to reuse old or dirty fluid. Do not overfill
the unit; this can damage the surface finish. If spillage of the brake fluid occurs, wash off the spilled brake fluid immediately to prevent damage to surfaces. Avoid any physical contact with the brake fluid. Please Note that the breather cap must be removed when bleeding the brakes. You can then securely fit the breather cap back on the unit when you have completed the bleeding process.
ELECTRICAL INSTALLATION REQUIREMENTS
Mount the emergency breakaway switch and emergency breakaway battery backup on the trailer, as detailed in the instruction sheets provided with the emergency breakaway system.
ATTENTION
The use of undersized electrical cable will increase electrical resistance and prevent this unit's correct operation.
ACTUATOR COLOUR CODE AND DIAGRAM
BLACK - 25-40 amp 12 volt Supply from Tow Vehicle BLUE - Output from in-Cab Electronic Brake Controller WHITE - Trailer and Tow Vehicle Ground YELLOW - Cold side of the breakaway switch


BLACK 25-40 AMP 12V SUPPLY - TOW VEHICLE

BLUE OUTPUT IN CAB CONTROLLER

WHITE - GROUND WIRE

YELLOW TO BREAKAWAY SAFETY SWITCH
Please note:
1.
Cold temperatures require up to 40 amp (below 0 Fahrenheit / -17 Celsius).
2.
This wiring diagram is specific to the most common breakaway kits. However, there maybe different breakaway kits, which use other wiring configuratuions and color codes. Therefore, you will need to check the specific manufactures’ specifications.
It is important that the Black Power and the White Ground wires from the tow vehicle to the actuator unit are the correct size (12- gauge wire minimum) and properly terminated to a 25–40-amp circuit on the vehicle. For best performance, use 10-gauge wire.
Temperatures below 0 degrees F (-18 degrees C) will require a 40- amp circuit.
The Blue wire from the In-Cab electronic brake controller is connected to the Blue wire on the actuator unit. The Yellow wire from the actuator unit is connected to the cold side of the trailer emergency breakaway switch.
To avoid damage to the electronics, the actuator unit's Blue wire and the Yellow wire should never be connected. Similarly, the Blue wire or the Yellow wire should never be grounded.
The Deutsche Hydrapro actuator must be used with an In-Cab Electronic brake controller. The unit will operate with various In-Cab controllers, but optimum performance is achieved using proportional, inertia type electronic brake controllers.
The in-cab controller must have an output capacity of at least 5 amps for proper operation of the Deutsche Hydrapro actuator unit.
ATTENTION
The end user's responsibility is to ensure that their In-Cab electronic controller is compatible with the Deutsche Hydrapro actuator. Attempts are made to provide compatibility with most In-Cab controllers, but some brands and models of In-Cab controllers may not be compatible with the Deutsche Hydrapro actuator unit.
The best performance for the Deutsche Hydrapro braking unit is achieved with a proportional, inertia type In-Cab controller. The older, non-proportional controllers are unsuitable and can damage the brake actuator unit. (It is essential that when the tow vehicle is stationary, the brake actuator is not constantly operating at full
pressure). For a list of compatible In-Cab controllers, please refer to your dealer or check the Deutsche Hydrapro website.
An emergency breakaway system with battery backup must be fitted to the trailer to comply with standard requirements. In addition, the breakaway system's battery backup needs to have a minimum capacity of 5-amp hours and be fully charged at all times.
The breakaway system's battery must be kept fully charged to function correctly. Therefore, charging the battery directly from the tow vehicle must be done using the correct charging device included with the breakaway system.
TEST THE ELECTRIC HYDRAULIC OPERATION
Attach the trailer to the towing vehicle. However, do not connect the trailer plug to the tow vehicle yet.
Pull the breakaway switch. The Deutsche Hydrapro unit should run. If it does not run, check the breakaway battery and wiring system. Then, reset the breakaway switch to switch the brake actuator unit off.
When the Deutsche Hydrapro unit runs, the motor will generate a "hum" that changes pitch as the unit is pressurized.
· Now connect the trailer plug to the tow vehicle.
· Apply the In-Cab controller emergency manual activation button. The Deutsche Hydrapro unit should now run and pressurize.
ATTENTION
This test of the Deutsche Hydrapro actuator unit confirms that it is operating. However, it may not be functioning correctly. Therefore, regular inspection, adjustment, and maintenance of the brakes are necessary to ensure proper brake operation.
BLEEDING THE BRAKES AND ADJUSTMENT Please Note Before Starting:
It is more efficient to bleed the brakes with two people working together, one to control the brake pressure and the other to release the brake bleeder valve.
if your trailer is fitted with drum brakes, the brake shoes must have the correct clearances specified by the manufacturer. Failure to properly adjust drum brakes on trailers will result in a slower braking response time.
Ensure that the Deutsche Hydrapro unit does not run out of brake fluid. You should frequently check the level and top up the brake fluid throughout the bleeding procedure.
The breather cap MUST BE REMOVED when bleeding the brakes and only replaced when the bleeding process is completed.
Follow Steps 1 to 8
Install plastic tubing onto the bleeding nipple of the brake cylinder or caliper at each wheel hub.
Immerse the free end of the plastic tube into a clean container partially filled with brake fluid.
Open the bleeding nipple on the wheel cylinder or caliper furthest from the Deutsche Hydrapro unit. If the tow vehicle has more than one axle, always start bleeding the wheel furthest from the Deutsche Hydrapro unit first.
To activate the Deutsche Hydrapro unit, turn the ignition switch on and use the emergency braking switch on the In-Cab controller or the breakaway switch fitting to the trailer to make it run. (Using the brake pedal in the tow vehicle will not work with most In-Car controllers when stationary).
Watch the free end of the bleeder hose for air bubbles escaping into the clear container. As soon as the bubbles stop, lock the bleeding nipple.
Turn off the Deutsche Hydrapro unit and remove plastic tubing from the bleeding nipple. The bleeding of the brake caliper or cylinder is now complete.
Refill the Deutsche Hydrapro unit with brake fluid.
Repeat this process with all the brakes at each wheel, always
starting on the next furthest one from the Deutsche Hydrapro unit.
ATTENTION
It is recommended that the brake bleeding procedure be performed twice for new trailers fitted with disc brakes.
Please note that air trapped in the trailer brake line system will cause delayed braking performance.
TESTING AND ADJUSTMENT: ELECTRONIC CONTROLLER
Adjust the gain setting on the In-Cab controller to a mid-range setting
Drive the tow vehicle with the trailer at 15 to 20 kph
Apply the brakes. If braking is too hard, adjust the gain setting
on the In-Cab controller down to decrease the braking pressure, then retest. If braking is too soft, increase the gain setting on the In-Cab controller; and then retest.
Repeat this process until the braking pressure is set to the correct level.
ATTENTION
The correct pressure setting will vary depending on the weight of the load, weather, and road conditions. Therefore, retest the braking performance each time the trailer is used. Failure to properly adjust the Deutsche Hydrapro actuator may result in poor braking performance and could result in severe or fatal injuries or property damage.
When using an In-Cab controller other than an inertia type, reduce the gain setting on the In-Cab controller when stopped in traffic for long periods. This will prevent the actuator from overheating and avoid possible damage to the electronics and or the electric motor in the actuator.
TROUBLESHOOTING GUIDE
The brake unit will not run, or the brakes are slow to respond. To determine if the brake unit is functioning correctly, perform the following checks:
Step 1
Ensure that the wiring is connected by conferring with the wiring diagram in the "Electrical Installation Requirements" section.
Re-bleed the trailer brakes. If there is air in the trailer brake lines, it can cause braking delay.
If the trailer is equipped with drum brakes, re-adjust the drum brakes to the trailer manufacturer's recommended tolerances.
If trailer wiring is too small, it can cause a slow response. (See the section on Electrical Installation Requirements).
Undersized brake lines can cause delayed braking response. The trailer brake lines must be at least 3/16" in diameter.
Ensure the white ground wire is connected directly to the tow
vehicle ground. Please note that the ground wire must be connected directly to the tow vehicle battery ground.
Step 2
Now, disconnect all the wires from the Deutsche Hydrapro unit to the tow vehicle leaving just the blue, black, white, and yellow wires. All other wires must be disconnected from the tow vehicle to test the brake unit successfully.
Using a 12-volt battery, connect the white wire to the battery's negative (-) terminal.
Then connect the black wire to the battery's positive (+) terminal. 17
· The motor should not run. If it runs, the unit could be faulty.
Step 3
Leave the white wire connected to the battery's negative (-) terminal.
Connect the blue and black wires together to the battery's positive (+) terminal.
The motor should run, and the unit should pressurize.
If this does not occur, the unit may be faulty.
Step 4
Leave the white wire connected to the battery's negative (-) terminal.
Connect only the yellow wire to the battery's positive (+) terminal.
The motor should run, and the unit should pressurize.
If this does not occur, the unit could be faulty.
If the unit checks out okay, reconnect the wires leading to the trailer plug and repeat steps 1 through 4 at the trailer plug. If you do not get the same results as before, the trailer wiring or the electronic in- cab brake controller is the problem.
Using the breakaway system to check a brake unit that is not operating correctly:
1. With a fully charged breakaway battery and trailer plug disconnected, pull the breakaway switch on the trailer.
a. If the unit runs and builds pressure, the breakaway system is functioning correctly.
b. If the unit runs and builds pressure when the breakaway switch is pulled but will not function under normal operating conditions, the problem most likely is a faulty in-cab controller or defective wiring between the tow vehicle and the Deutsche Hydrapro unit.
c. If the unit runs but will not build pressure when the breakaway switch is pulled, the Deutsche Hydrapro unit may be faulty.
d. If the unit does not run, measure the DC voltage between the white wire and the yellow wire. If the voltage is less than 12 volts, either the battery hasn't enough charge, the breakaway switch or the breakaway wiring is at fault.
2. After completing the above steps, reset the breakaway switch and reconnect the trailer plug. If the trailer brakes are too aggressive:
reduce the gain setting on the in-cab brake controller.
Check brake adjustment.
DEUTSCHE HYDRAPRO LIMITED WARRANTY
Deutsche Hydrapro warrants to the original purchaser that the Deutsche Hydrapro brake actuators (the unit) shall be free from defects in material and workmanship for two (2) years from the date of the first sale or to the first retail purchaser of a trailer or other towed device to which the unit is fitted.
Any receipts, proof of purchase, or other documents obtained at the time of purchase from a dealer/distributor, should be retained. This warranty is
not transferable.
The duration of any implied warranties, including the implied warranties of merchantability and fitness for a particular purpose, are limited to the duration of the express warranties herein. Deutsche Hydrapro hereby excludes incidental and consequential damages, including loss of time, inconvenience, loss of use, towing fees, telephone calls, or cost of meals, for any breach of any express or implied warranties, including the implied warranties of merchantability and fitness for a particular purpose.
This warranty shall not extend to any unit or any parts thereof that have been improperly installed contrary to the provided instructions, altered, tampered with, or the engineering and design of which have been changed in any way, nor will this warranty extend to any defects arising from abuse, misuse, accident, improper wiring, or negligence of an installer or the consumer. Please refer to the instruction manual included with the Deutsche Hydrapro unit.
If it is determined that the claim is valid, the unit will be repaired, replaced, or a credit issued. If a claim is deemed invalid and the unit is found to work correctly, the unit will be returned to the submitter, freight collect, unless otherwise instructed.
This warranty is not transferable from the original owner.
All inquiries regarding these warranties should be addressed to the original place of purchase. For further information, please email info@hydraprousa.com
Feel free to contact us by phone, email or via contact us form.

445 E FM 1382, Suite 3672
Cedar Hill, TX 75104